Inlay Cuff Bracelet Course Preview and FAQs
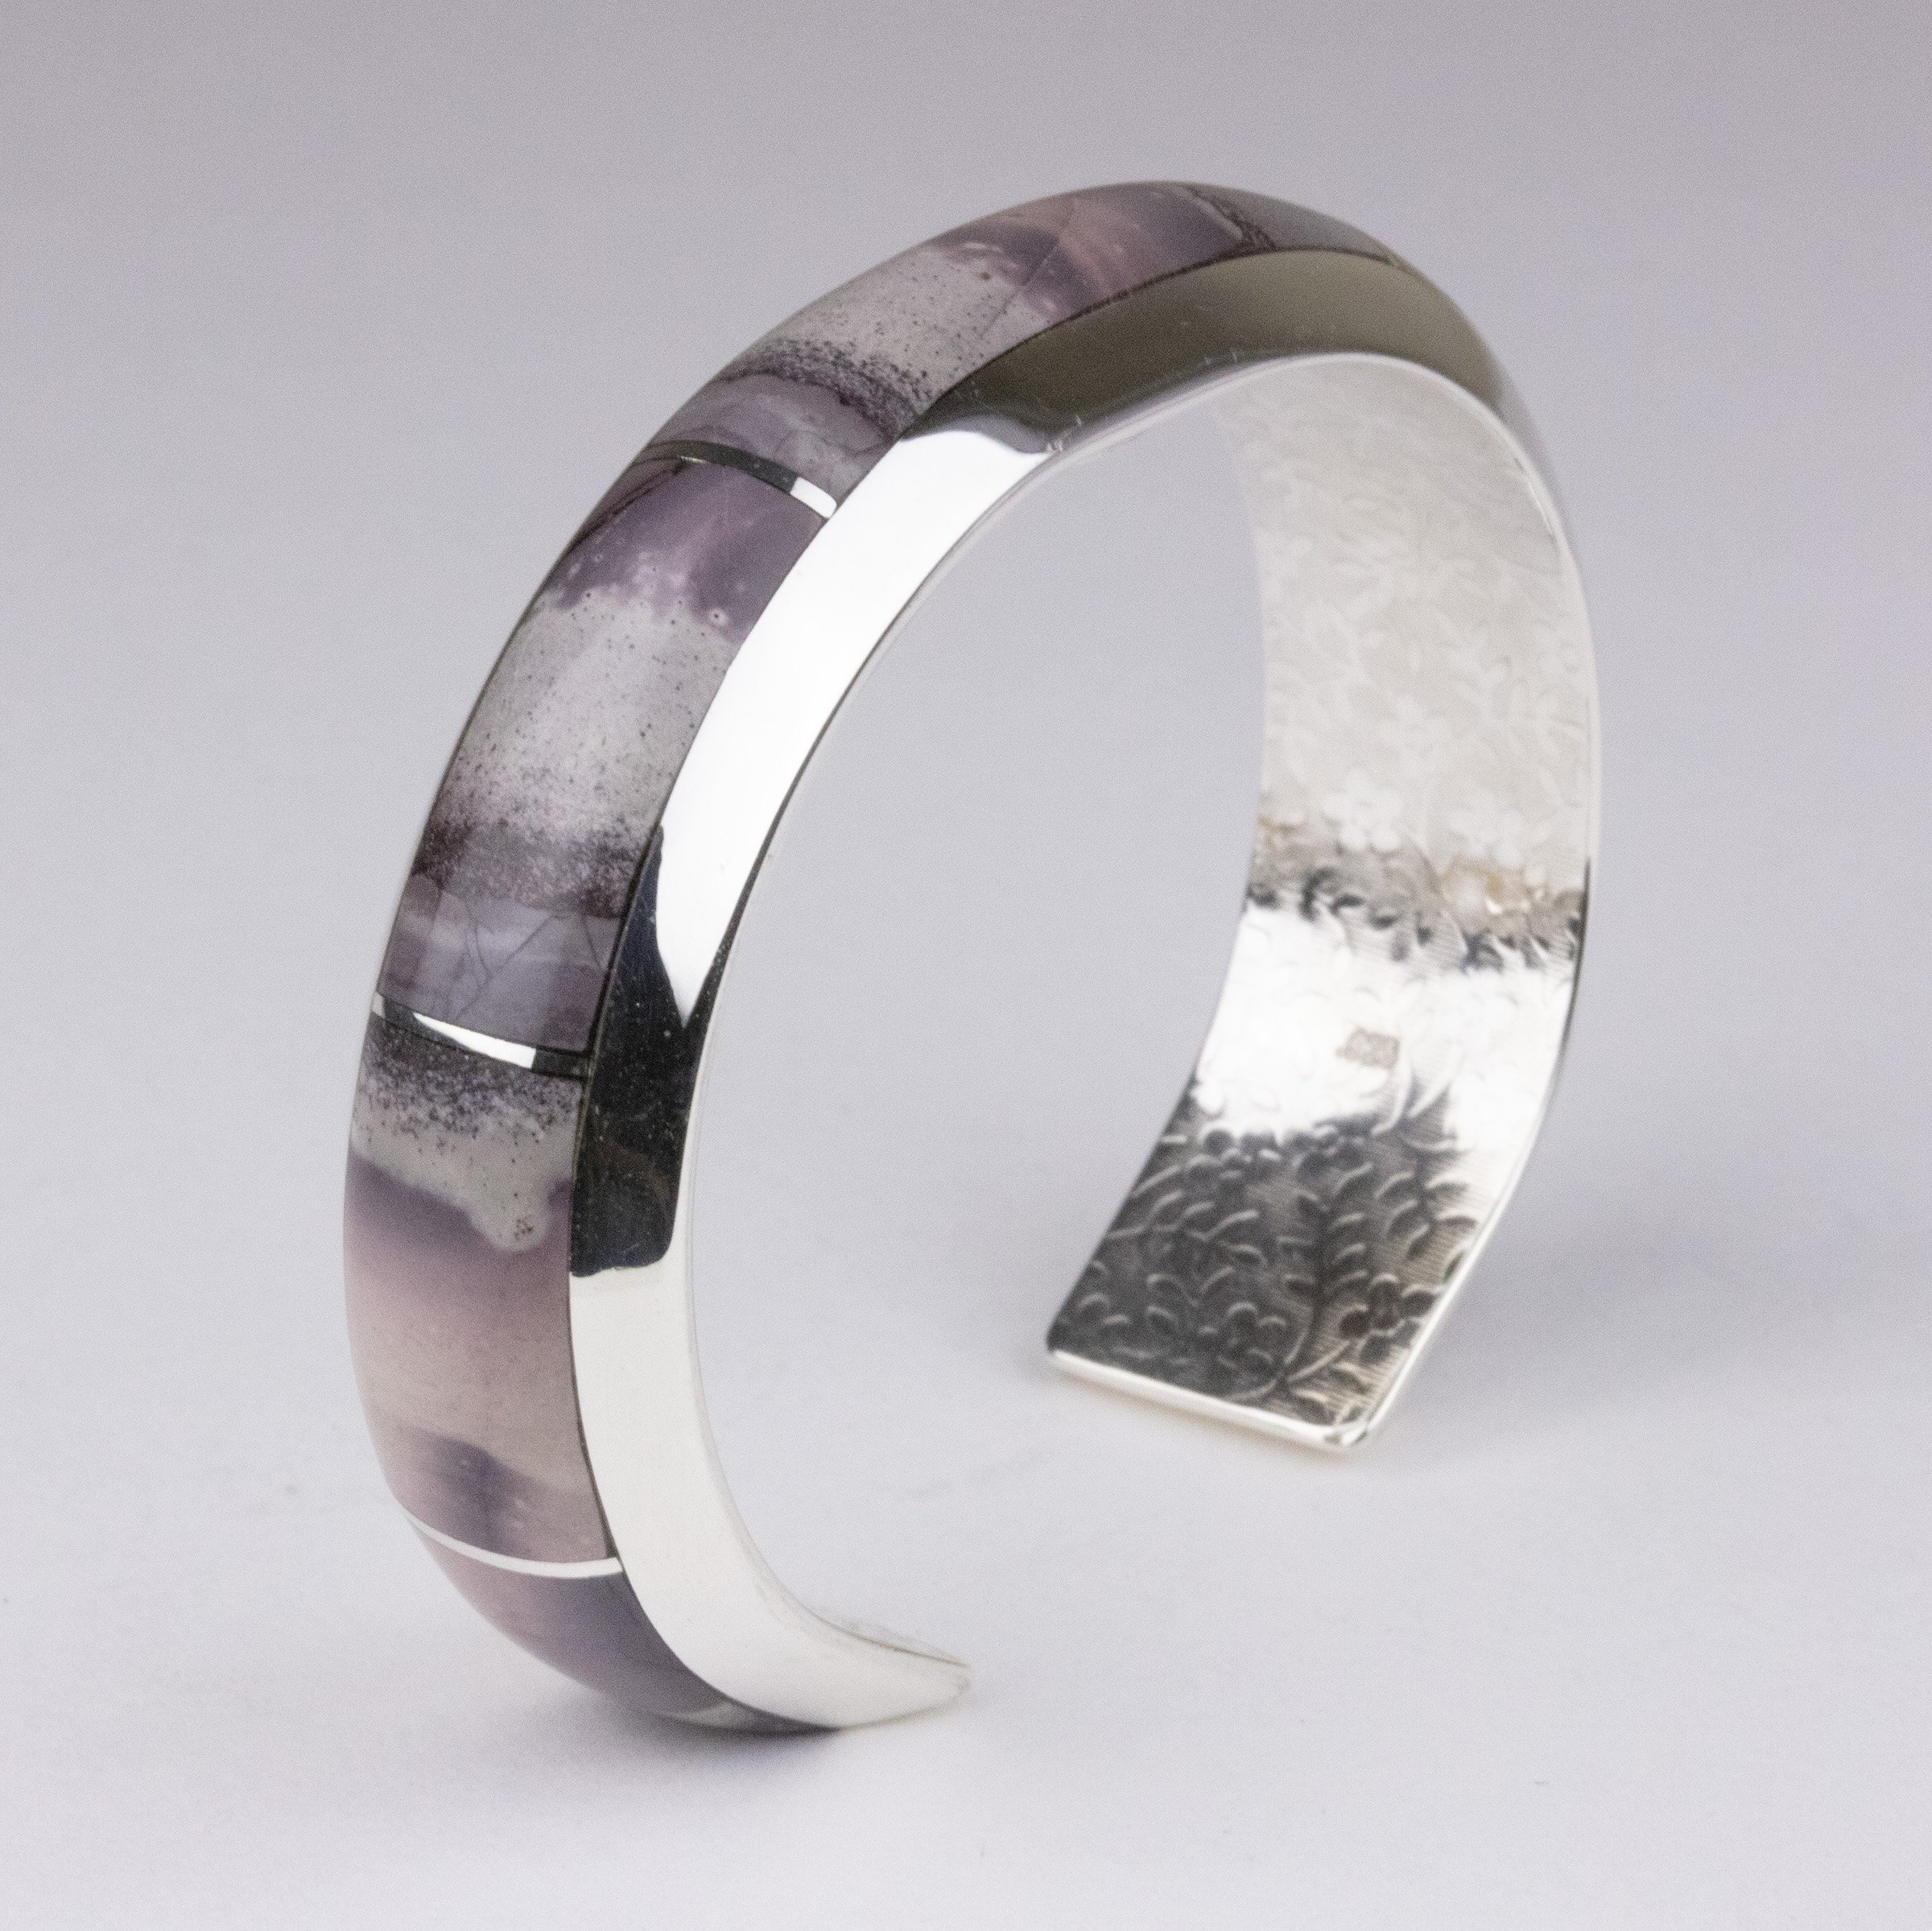
If you’ve been wondering how to make an inlay jewelry like this cuff bracelet…
In my easy-to-follow online class, you’ll be able to make your own!
What’s all included in the online inlay cuff bracelet class?
This online course will enable you to work from anywhere in the world—all you need to do is sign up and you’ll have login access to the videos directly on my website.
Almost 2-hours of videos with endless tips and tricks to making a perfect inlay cuff.
Set at a brisk pace for more advanced levels so you’re never bored, but you have 24/7 access to replay and revisit these videos anytime.
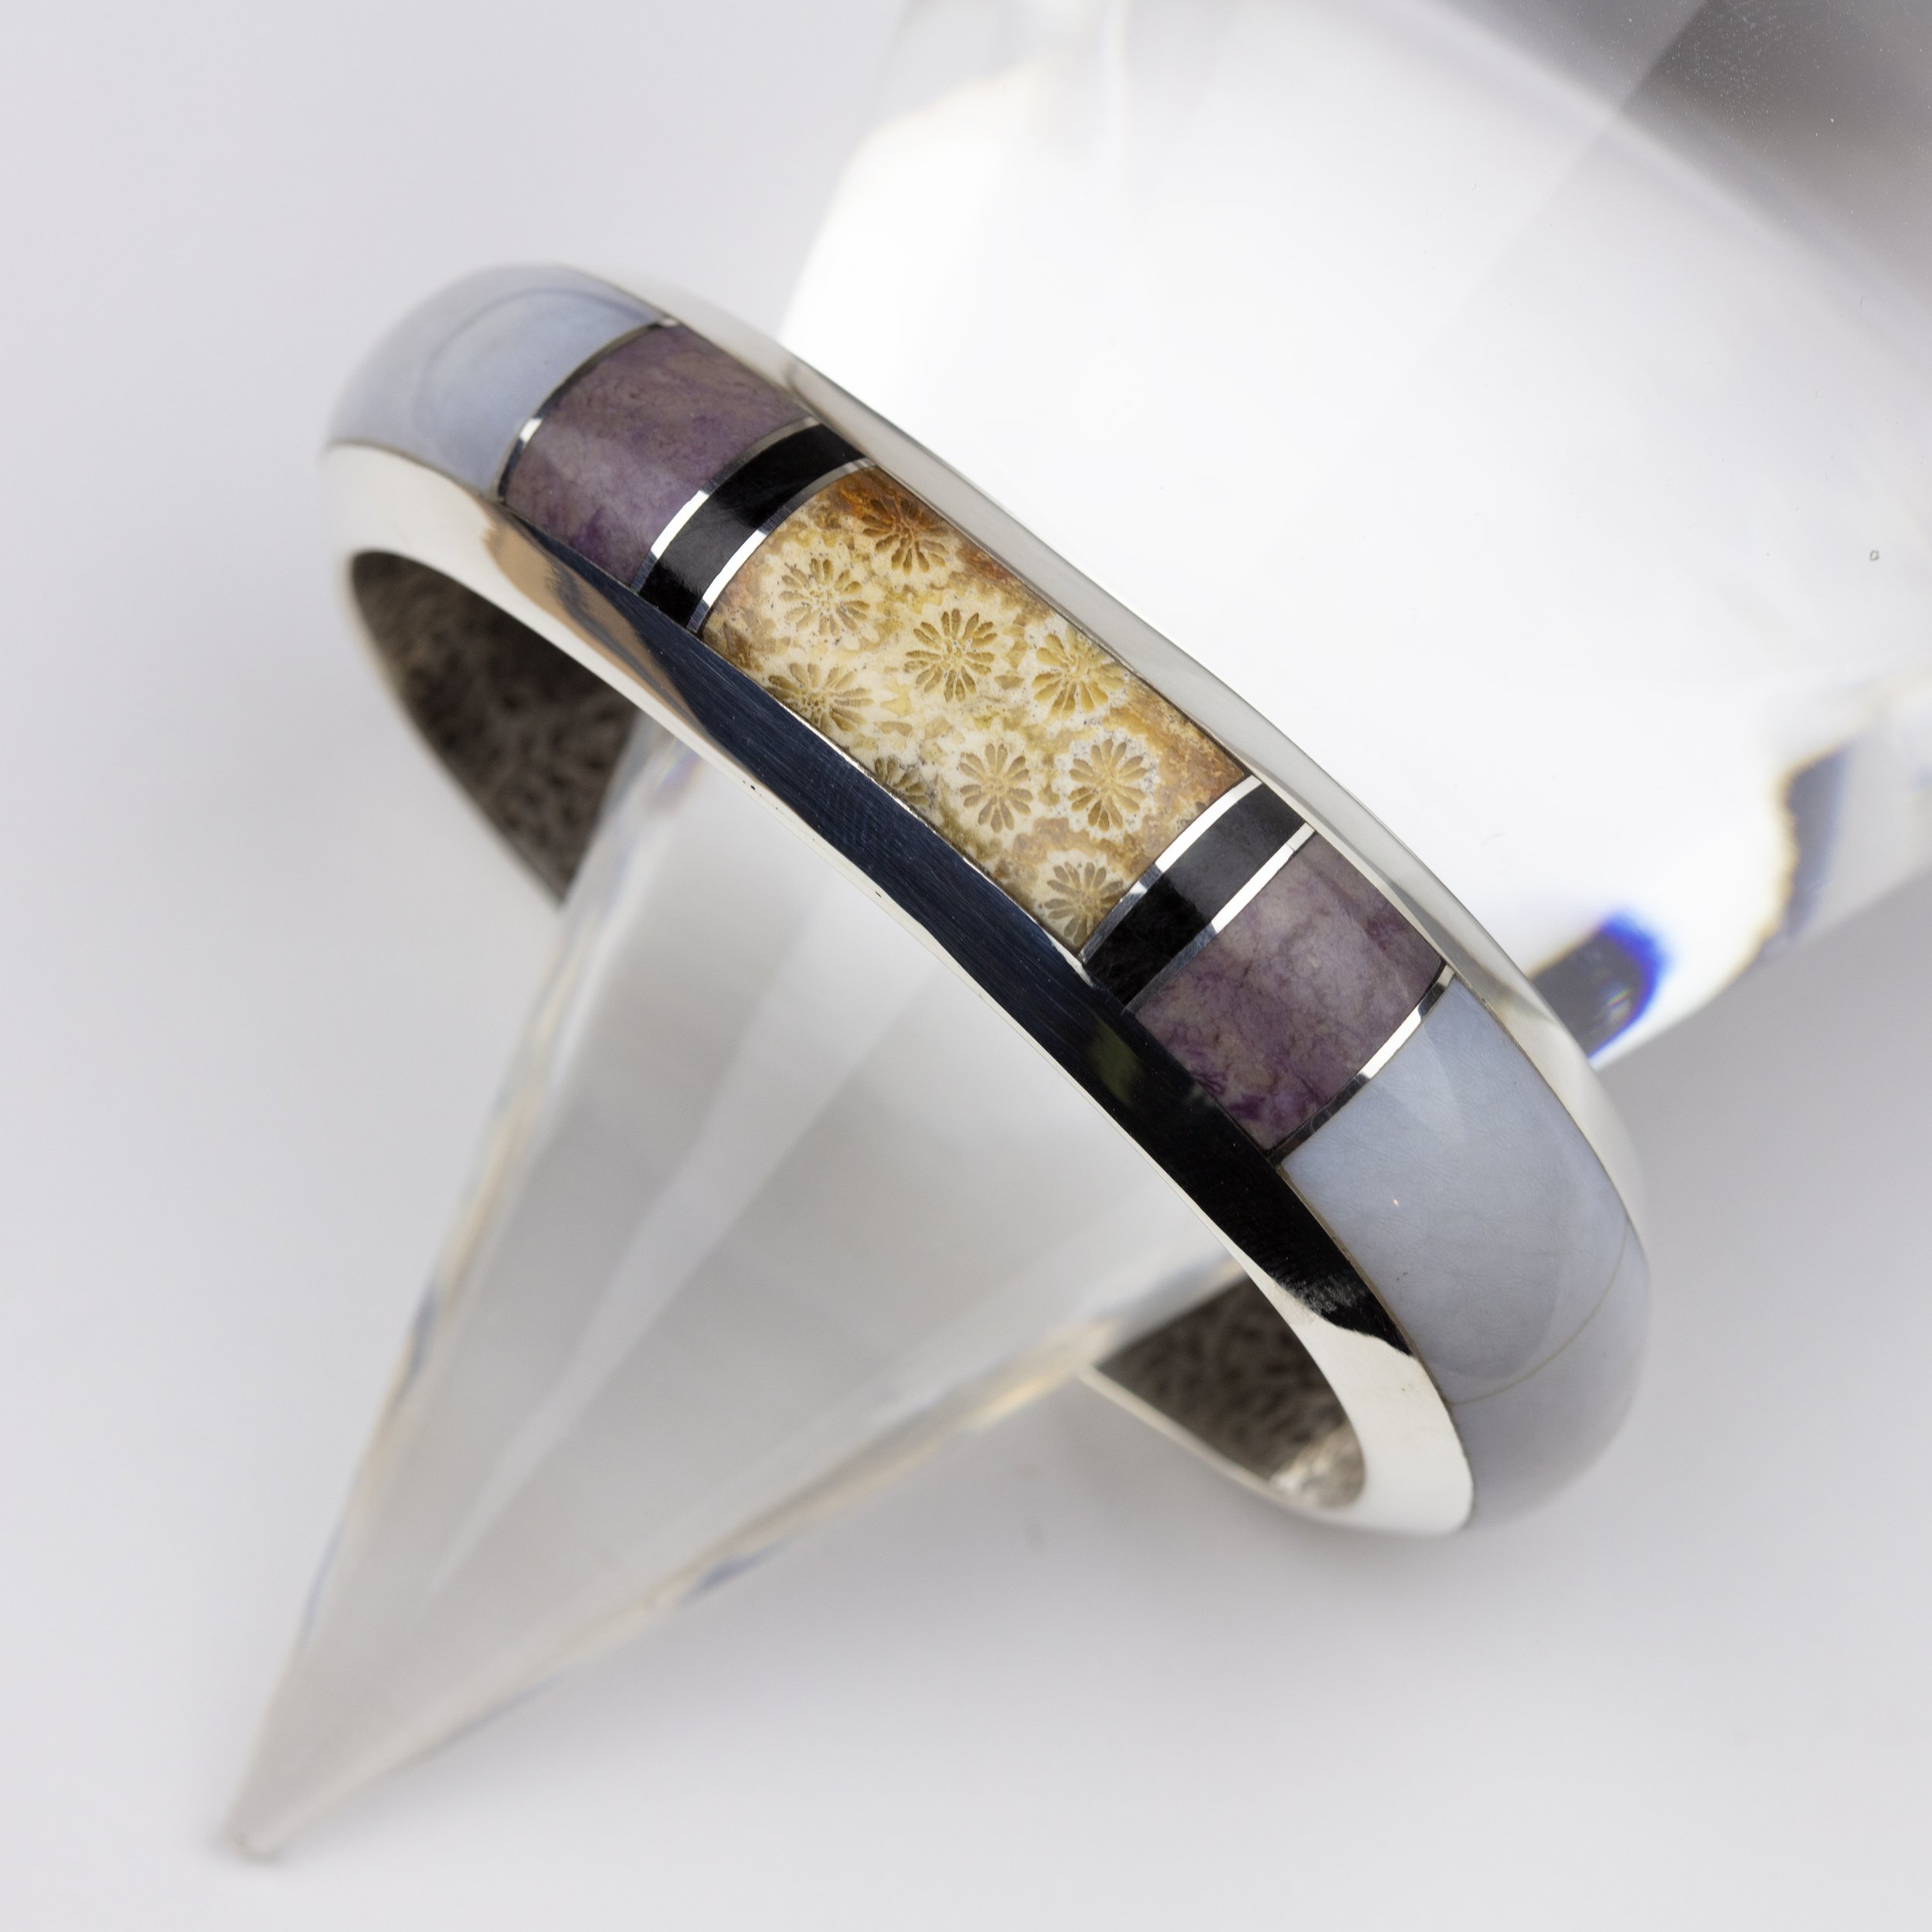
Not only will you learn how to cut the stones tightly for this inlay, but I’ll also show you how to construct and bend the cuff yourself.
I cover how to do a flush-cut inlay cuff, not a cobblestone inlay (but if that’s something you want me to cover, please email me to let me know if you’re interested!).
You’ll learn how to do an inlay with a single stone with sterling silver banding between the stones, but I also made a Bonus Part 3 that will teach you how to work with stones of varying hardnesses.
I’ll also show many ways to do the same thing (for example, showing you how to bend a cuff with a cuff bending tool OR just doing it with a cuff mandrel) so that you can pick whichever is easiest for you.
Get a little sneak peek of the online course in this preview:
You have the option of using a bracelet mandrel to curve your cuff, or using a bracelet bending tool like this.
I’ll have some available for purchase in my shop by clicking the image, or you could make your own using the free video tutorial below!

This tool is made for students who are taking my inlay cuff bracelet class (and you can find more information on that inlay class here), but this tool is SO useful for any cuff that’s using a thick gauge and is hard to bend.
Instead of using a rawhide mallet and banging your cuff against a bracelet mandrel to shape your cuff—and marring the triangle wire in the process—this tool helps you easily get the perfect cuff shape each time.
While you could spend your time fiddling around with making this tool yourself—and spend over $35 on raw materials alone— you should be spending your precious time working on your creative projects.
This tool is made with red cedar and comes with 3 different PVC sizes for you to work from the largest PVC to the smallest to refine the curves of your cuff.
How to use a Cuff Bending Tool: https://youtu.be/LdROWjTq8Ws
It does not come with a vise, but you’ll need one to hold the tool in place. This is the one I use: https://amzn.to/3PH4xbk
*When using the tool, I recommend placing a piece of leather or something similar between the oak and the cuff bracelet to provide a little padding and to keep the oak from getting chewed up. A piece of denim that can be doubled up for padding will be included as a bonus while supplies last.
Inlay Cuff Tutorial FAQs
What skills do I need to take this class?
While this would be considered more of an intermediate level class, you can conquer this course with your basic silversmithing skills like soldering, sawing, annealing, and the like. The most challenging silversmithing part is soldering the triangle wire to the backplate because it requires a much larger flame than you’re probably used to!
As for lapidary skills, you're good to go if you have proficiency making cabochons. Even better if you’ve worked on some calibrated cabs since that’s basically what we’re doing here.
What tools and materials will I need?
As a metalsmith and lapidary, you probably have just about everything you need already to complete this cuff bracelet, but I have complete lists and links of everything you need for each part of this course. You can find them when you click on each video when you purchase this course. I’d recommend watching the videos first then deciding which tools you really need and which ones you don’t since I often show many ways of doing something.
The biggest necessities are a torch, a flex shaft (or something similar), a cabbing machine, and a slab saw.
How long will I have access to the course?
You’ll have access to the course for at least 6 months which will give you plenty of time to get the materials you need, watch and re-watch the videos, and make the cuff of your dreams!
What if I get stuck in the middle of this project?
A big perk of in-person jewelry classes is that an instructor is there to swoop in and take over if you're struggling with something. Instead of doing the work for you, it’s always more valuable if you learn how to do it yourself—with a little guidance. For simple problems we can email or have a short phone convo, but for those that would like something extra, we can schedule a one-on-one video chat. Just use my contact form to get in touch when you’re ready!
Can I get a refund for the class?
Because of the nature of online courses being able to be so quickly accessed, I cannot give out refunds. It takes me a lot of time to do everything myself from the filming, editing, voiceovers, and more to make these as thorough as possible, so I hope that you can understand! :)
Who did you learn from?
I initially learned how to make flush-cut inlay from Chuck Bruce and after years of perfecting techniques, I have developed new ways to make the process much easier for people who are trying to make one of their own for the first time.

Get started on yours today!
Learn how to make a flush-cut inlay cuff bracelet--from building the sterling cuff all the way through cutting the stones for your cuff.