Intricate Onyx and Turquoise Inlay Ring Repair

My client came to me with this extremely intricately made mosaic inlay ring with hopes that I could replace the missing side panel and small section of stone in the front center.
(Skip to the bottom if you want to see a short video of the inlay ring repair process!)

When the ring arrived and I went to inspect it in-person for the first time, I noticed that the epoxy was very “springy” when I pressed my finger into it—which isn't good a good sign that it will hold up much longer.
I gave my client a few options of what to do, but because this ring has a lot of sentimental value, we decided to do a full overhaul of this ring by removing all of the stones and starting fresh.
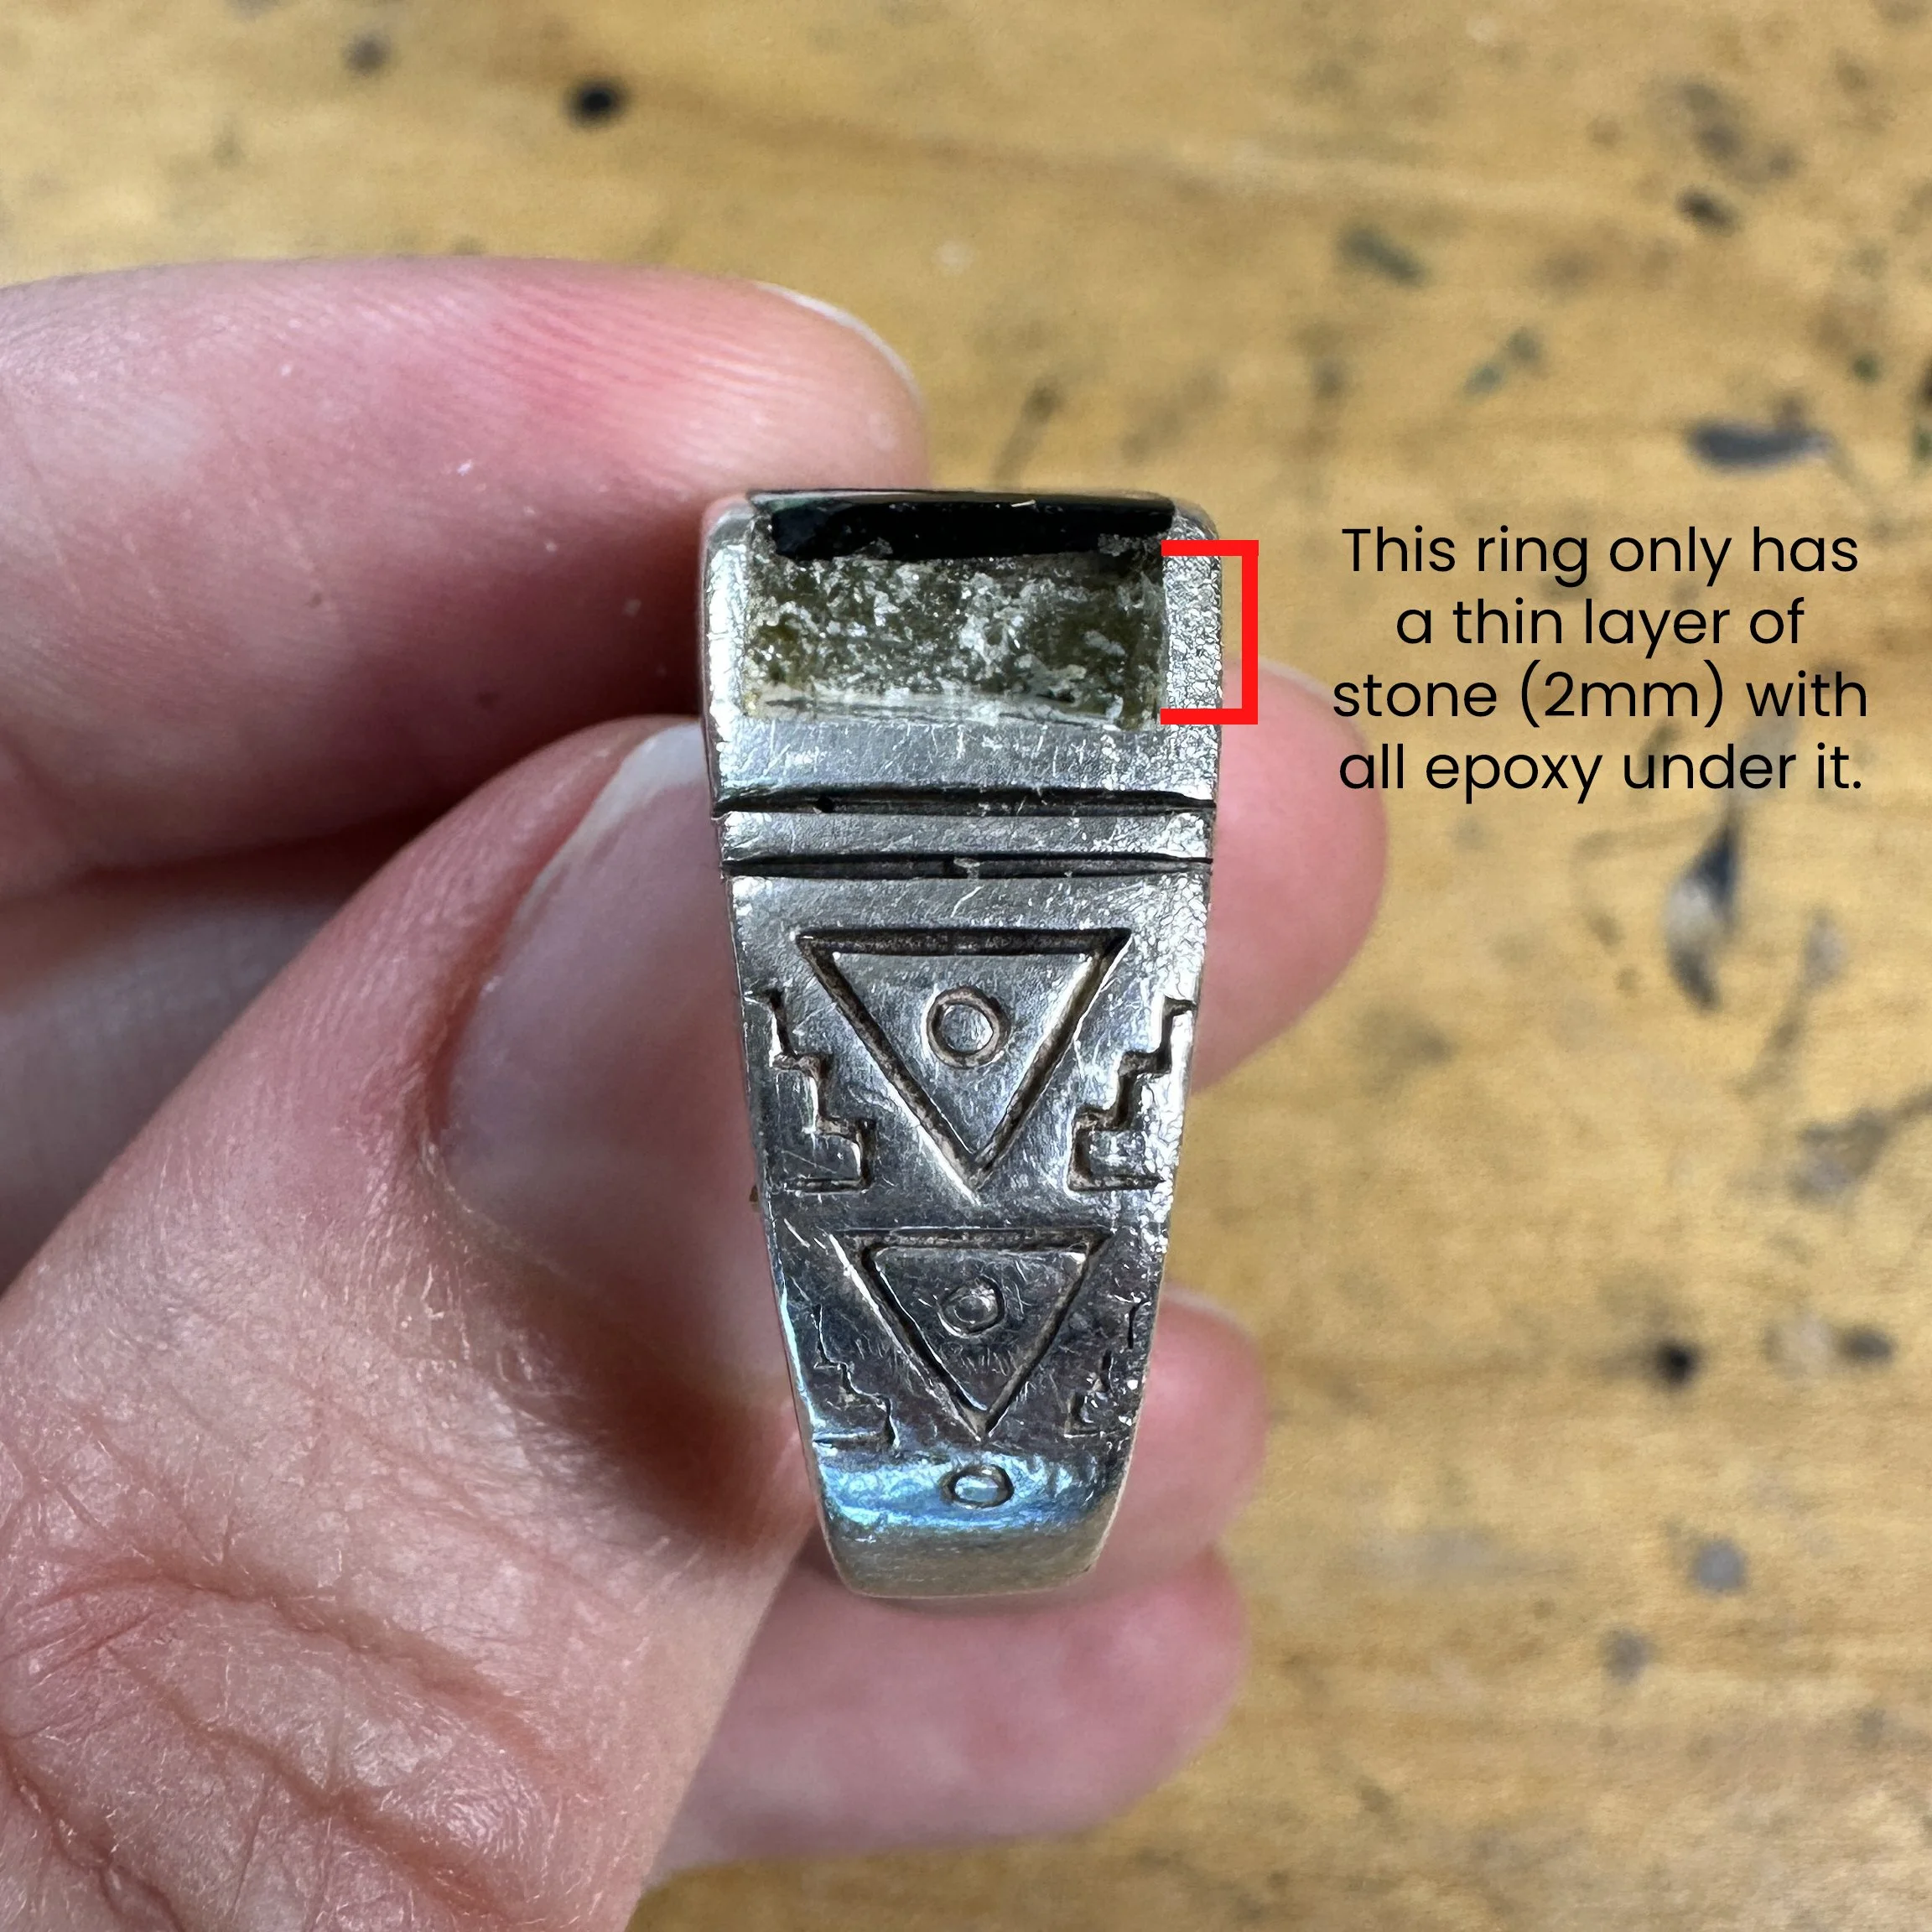
Looking at this side profile of the inlay ring, you can see that there really isn’t much stone there: only about 2mm of stone thickness, with quadruple that in epoxy underneath it.
Because the stone is so thin, it doesn’t have enough structural integrity to handle everyday wear and tear. To remedy this, I backed these stones with another stone when they were put back together to give it extra strength.

To remove the stones, I soaked the inlay ring in acetone to safely break down the epoxy without harming the stones.
I could then re-assemble the mosaics and do a thorough clean of the sterling silver ring channel before refitting all of the pieces.

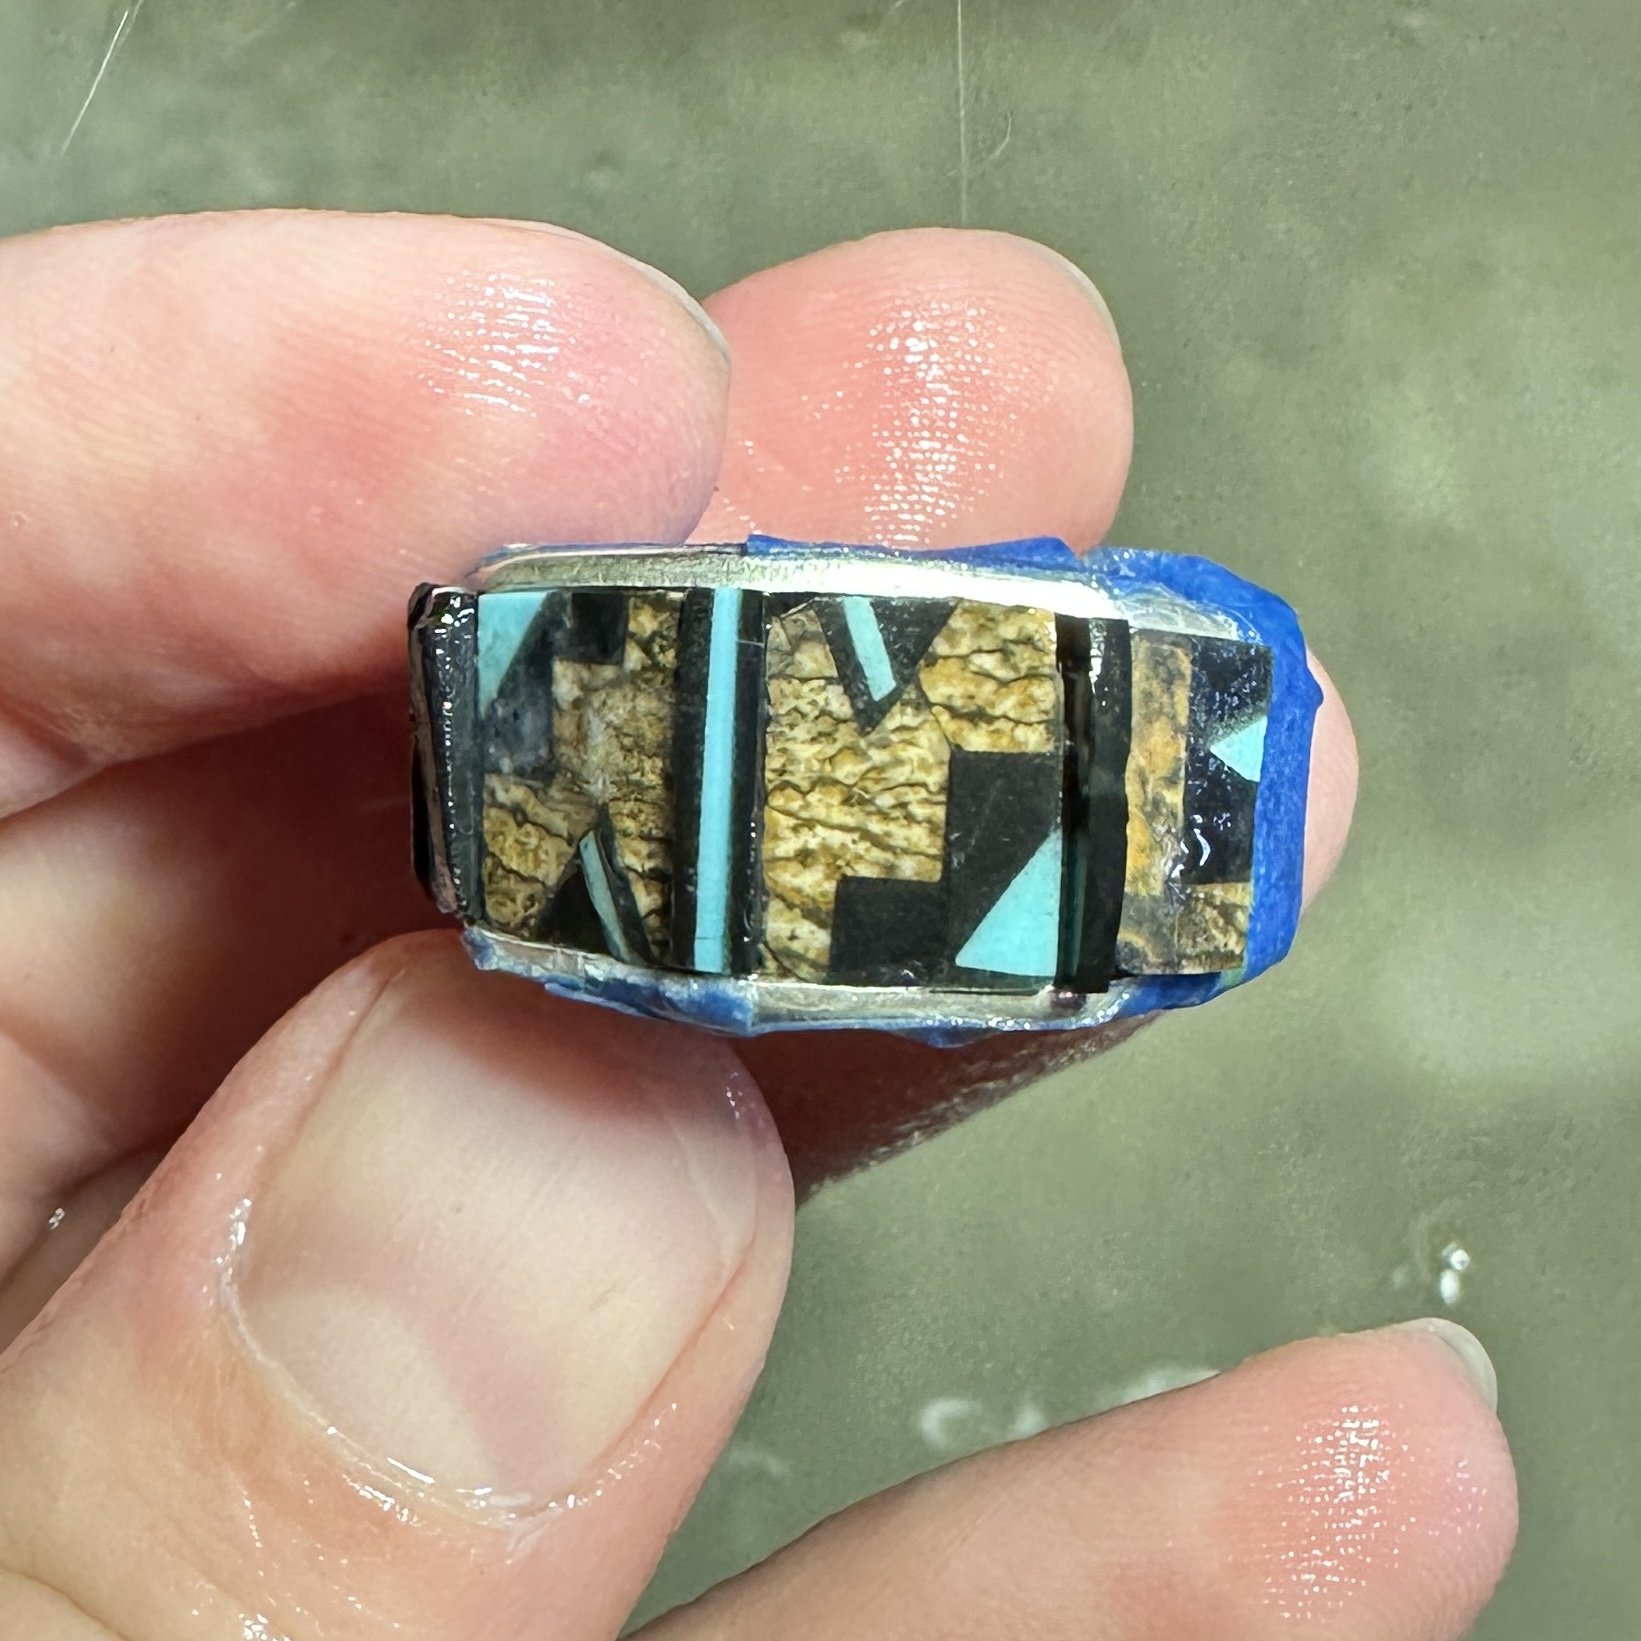
In this side view of the ring, I’m refitting the mosaic inlay panels into this ring. I affixed the mosaic to another stone for strength and durability since rings tend to get a lot more damage than other types of inlay jewelry.
In addition to recutting the missing side panel of this ring, I also recut all of the vertical bands since they were much more damaged than what met the eye and actually broke into multiple pieces when I soaked the ring in acetone to remove the stones.
This picture shows the ring before I cut the surfaces flush: you can see that many of the stones stick way up from the surface and it looks a little scary, but this is one of the “trust the process” moments because after 8 stages of cutting and polishing it will look sleek and shiny!


Some of you may be wondering: why didn’t I match the design on the missing side panel to the opposite one? When you look at that other side panel, you can see that the brown patterned stone looks different from the center panels, as if this inlay ring had already been repaired before. I felt as though the ring would look a little wacky with a 3rd brown stone thrown into the mix.
Also, even if I were to find out what stone was used in the center panels, it would be almost impossible to match the stone since it would have to almost be exactly from the same chunk of rough to do so.
With inlay repairs, my goal is to honor the original artist’s intent while also working within your budget.
Do you have a piece of inlay jewelry that needs repairing?